

Easy Guide: How Do I Cancel My Club Pogo Account?
In today’s digital age, online gaming has become a popular pastime for many. Club Pogo, a subscription-based gaming platform, has gained a significant user base. However, circumstances change, and so do preferences. In this article, we’ll delve into the nuances of cancel Club Pogo account and the importance of understanding the process.
A. Brief overview of Club Pogo
Club Pogo, a premier online gaming platform, has provided countless hours of entertainment to its users. Boasting a diverse range of games, from classic card games to exciting puzzles, it has become a go-to destination for gaming enthusiasts.
B. Importance of knowing how to cancel the account
Understanding the process of canceling your Club Pogo account is crucial for users for various reasons. Whether due to financial considerations, a lack of time, or simply exploring alternative entertainment options, canceling your account should be a straightforward and stress-free process.
Reasons for Cancelling
A. Financial considerations
For some users, financial constraints may prompt the need to reevaluate subscription services. If you find yourself needing to cut costs, canceling your Club Pogo account is a practical step. This allows you to allocate your resources more efficiently without compromising your gaming experience.
B. Lack of interest or time
Life’s demands can change, leaving little time for leisure activities. If your interest in gaming wanes or your schedule becomes too hectic, canceling your Club Pogo account ensures you are not paying for a service you no longer use.
C. Alternative entertainment options
The world of online entertainment is vast, and new options emerge regularly. If you discover alternative platforms that better suit your preferences, canceling Club Pogo can open the door to exploring these exciting alternatives.
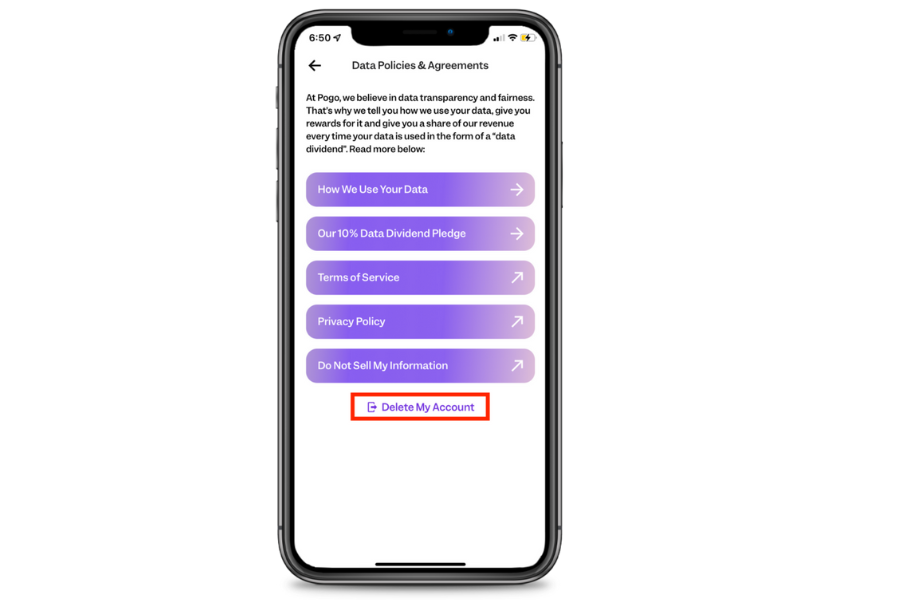
Steps to Cancel Club Pogo Account
A. Log in to Club Pogo account
Initiate the cancellation process by logging into your Club Pogo account. Ensure you have your login credentials on hand for a seamless experience.
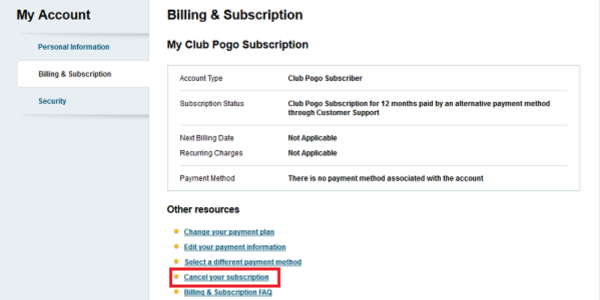
B. Navigate to account settings
Locate the account settings section, typically found in the user profile dropdown menu. This is where you can access the necessary options for canceling your account.
C. Locate the cancellation or subscription option
Within the account settings, search for the cancellation or subscription option. This step might involve scrolling or navigating through tabs, depending on the platform’s layout.
D. Follow on-screen instructions for cancellation
Once you’ve found the cancellation option, carefully follow the on-screen instructions. Club Pogo aims to streamline this process, ensuring users can navigate it effortlessly.
E. Confirm cancellation
Before finalizing the cancellation, a confirmation prompt may appear. Confirm your decision to cancel the Club Pogo account to complete the process.
Considerations and Warnings
A. Review cancellation policies
It’s prudent to review Club Pogo’s cancellation policies to understand any potential implications. Be aware of any refund policies or time frames associated with the cancellation process.
B. Check for any outstanding payments or obligations
Prior to canceling, ensure there are no outstanding payments or obligations tied to your Club Pogo account. Clear any dues to avoid complications down the line.
C. Save important account information before cancellation
Before finalizing the cancellation, save any important account information, such as game progress or achievements, for potential future use or reference.
Contacting Club Pogo Support
A. Finding customer support contact details
If you encounter issues during the cancellation process or have specific concerns, locate Club Pogo’s customer support contact details. This information is often available on the official website.
B. Inquiring about any concerns or issues
Feel free to reach out to club pogo support with any questions or concerns regarding the cancellation. They are there to assist you and provide clarity on any uncertainties.
C. Confirming cancellation with customer support if necessary
For added assurance, confirm the cancellation with Club Pogo’s customer support. This step can provide peace of mind and ensure that your account closure is processed smoothly.
Alternatives to Cancellation
A. Downgrading account instead of canceling
If canceling your Club Pogo account seems drastic, consider downgrading your subscription instead. This allows you to continue enjoying some features while reducing your financial commitment.
B. Exploring temporary suspension options
For users anticipating a temporary break from gaming, explore any temporary suspension options Club Pogo may offer. This way, you can resume your gaming experience when the time is right.
C. Seeking promotional offers or discounts
Before deciding to cancel, check for any ongoing promotional offers or discounts. Club Pogo occasionally provides incentives that may influence your decision to continue your subscription.
After Cancellation
A. Confirmation of cancellation
Upon completing the cancellation process, expect to receive a confirmation message. This serves as official acknowledgment that your Club Pogo account has been successfully canceled.
B. Receiving any confirmation emails
Check your email for any confirmation emails from Club Pogo. These messages often reiterate the successful cancellation and may include additional information or instructions.
C. Verifying account closure
To ensure closure, attempt to log in to your Club Pogo account after receiving confirmation. If access is denied, it confirms that the cancellation was effective.
Conclusion
A. Recap of key steps and considerations
Canceling your Club Pogo account is a straightforward process when following these outlined steps. Whether motivated by financial considerations, lack of interest, or exploring alternatives, users can navigate the cancellation process with ease.
B. Final thoughts on canceling Club Pogo account
In conclusion, canceling your Club Pogo account is a personal decision influenced by various factors. By understanding the steps, considerations, and alternatives, users can make informed choices that align with their current preferences and circumstances.