


Easy Guide: How To Remove Tesla Charging Cable?
Tesla’s charging cables are designed with precision, ensuring a secure connection between the vehicle and the charging station. The cables feature a robust locking mechanism, safeguarding against accidental disconnections. In this guide we will explain how to remove tesla charging cable easily.
The Step-by-Step Guide to Tesla Charging Cable Removal
Step 1: Prepare Your Tesla Vehicle
Begin by ensuring your Tesla vehicle is in the ideal state for cable removal. Park the vehicle in a level and well-lit area, engaging the parking brake for added safety. It’s also advisable to turn off the vehicle to prevent any electrical complications during the process.
Step 2: Locate the Charging Port
Locating the charging port is a fundamental step in the cable removal process. In Tesla models, the charging port is typically located on the vehicle’s rear or, in some cases, on the side. Once identified, open the charging port door.
Step 3: Assess the Locking Mechanism
Tesla’s locking mechanism is designed to provide a secure connection while charging. Before attempting to remove the cable, take a moment to inspect the locking mechanism. Ensure there are no visible signs of damage or obstruction.
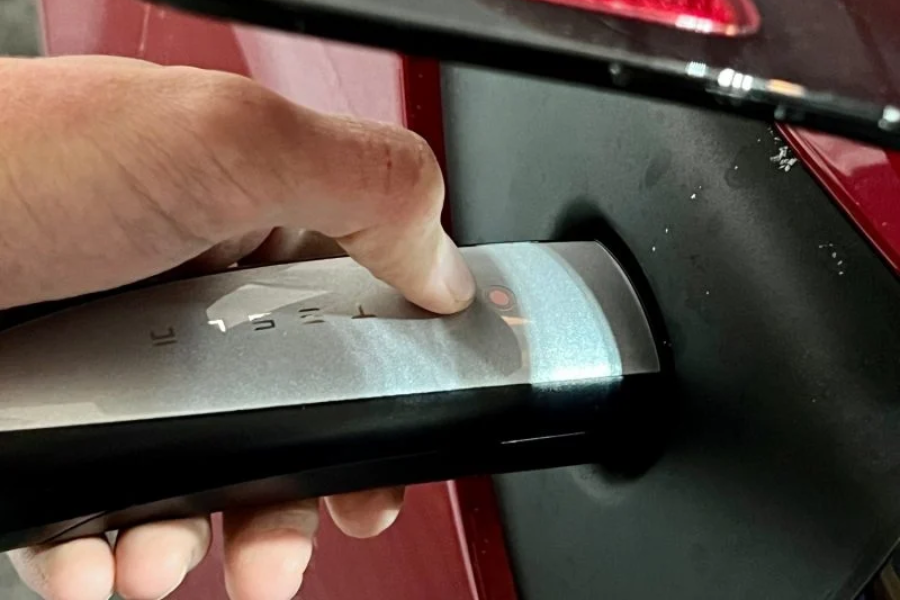
Step 4: Depress the Release Button
To initiate the cable removal process, locate the release button on the charging connector. Depress the release button firmly, holding it down throughout the removal process. This action disengages the locking mechanism, allowing for a smooth removal.
Step 5: Gently Remove the Cable
With the release button depressed, gently pull the charging cable from the port. It’s crucial to exercise caution and avoid applying excessive force, as this may cause damage to the cable or the vehicle’s charging port.
Tips for Troubleshooting
Cable Stuck? Here’s What to Do
If you encounter resistance during the removal process, refrain from forcing the cable. Instead, double-check the release button and ensure it is fully depressed. If the issue persists, consult your Tesla owner’s manual or contact Tesla customer support for guidance.
Regular Maintenance for Optimal Performance
To ensure the longevity of your Tesla charging cable, consider implementing regular maintenance practices. Keep the cable clean, inspect it for any visible wear, and address any issues promptly to prevent complications during usage.
Conclusion
Mastering the art of Tesla charging cable removal is an essential skill for every Tesla owner. By following this step-by-step guide, you can confidently and safely remove the charging cable without compromising the integrity of your vehicle’s charging system.